

A wise doorbell is a handy and revolutionary approach to improve your comfort and residential safety and discover who’s at your door, even when you’re not at dwelling.
Utilizing two ESP8266 boards, we’ll construct a completely practical Wi-Fi sensible doorbell that integrates with House Assistant sensible dwelling automation software program and sends push notifications to your smartphone at any time when somebody rings the doorbell. This works each regionally and remotely.
Issues You Will Want
You have to the next elements to construct the DIY Wi-Fi sensible doorbell.
- 2 x ESP8266 microcontroller boards, corresponding to NodeMCU or D1 Mini, will function the mind of the doorbell
- Doorbell swap
- Micro USB energy provide
- DFPlayer Mini (MP3 participant module)
- microSD card (512MB or bigger)
- 2W or 3W (1″ or 2″ extensive) speaker for the sound output
- 2.4GHz Wi-Fi community
- House Assistant server operating on a Raspberry Pi, or you could set up House Assistant on an x86 PC.
- Jumper wires to attach all of the elements
Step 1: Compile the Firmware
We are going to compile two totally different firmwares:
- Sensible bell speaker firmware (receiver)
- Sensible bell swap firmware (transmitter)
To compile the sensible bell speaker and sensible bell swap firmware, comply with these steps:
- If not already put in, set up ESPHome in House Assistant: go to Settings > Add–Ons and click on ESPHome.
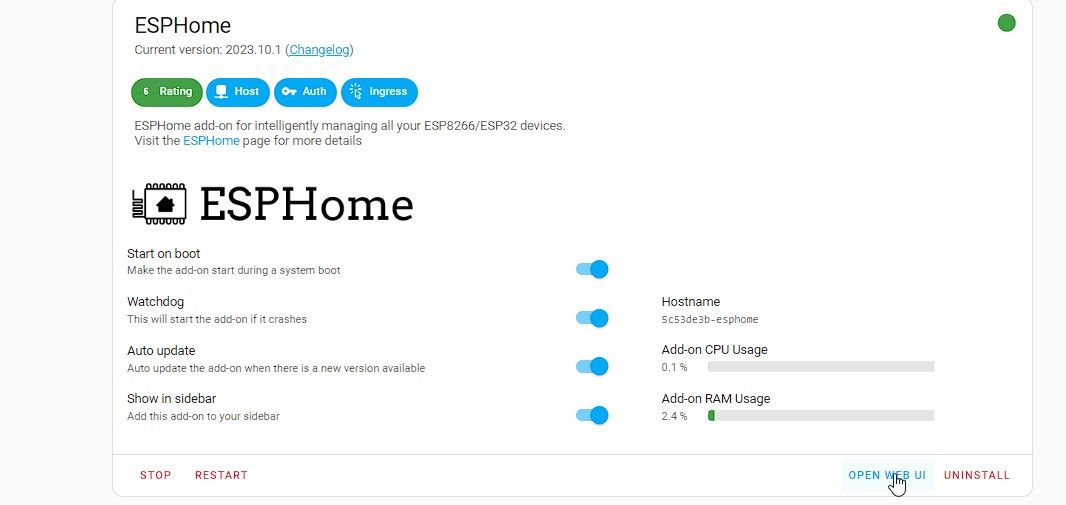
Screenshot by Ravi. NAR - Click on Open Internet UI after which click on New System.
- Identify the gadget something you need. For this tutorial, we known as it “smart-bell-speaker”. Click on Subsequent > Skip this step.
- Then choose ESP8266 board from the choices after which click on Skip.
- This may see a brand new configuration named smart-bell-speaker.
- Equally, create yet another configuration and title it smart-bell-switch.
- As soon as the configurations are created, open the smart-bell-speaker configuration by clicking on the Edit button.
- Then paste the next code beneath the captive_portal: textual content.
uart:
tx_pin: GPIO3
rx_pin: GPIO1
baud_rate: 9600dfplayer:
on_finished_playback:
then:
logger.log: 'Playback completed occasion'api:
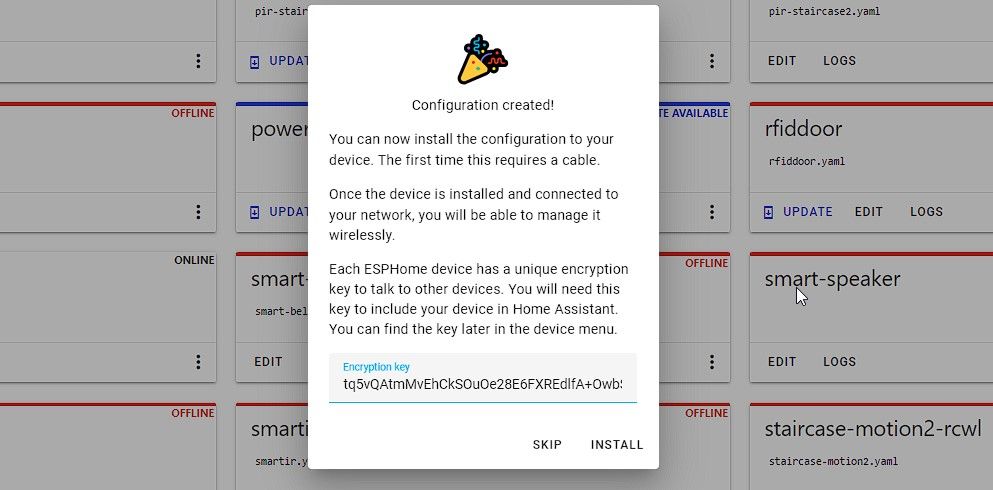
encryption:
key: "kQ5tP73N1pOl6XDYtq5RY15IaPsXjTg2A9g5nzHPejE="
providers:
- service: dfplayer_next
then:
- dfplayer.play_next:
- service: dfplayer_previous
then:
- dfplayer.play_previous:
- service: dfplayer_play
variables:
file: int
then:
- dfplayer.play: !lambda 'return file;'
- service: dfplayer_play_loop
variables:
file: int
loop_: bool
then:
- dfplayer.play:
file: !lambda 'return file;'
loop: !lambda 'return loop_;'
- service: dfplayer_play_folder
variables:
folder: int
file: int
then:
- dfplayer.play_folder:
folder: !lambda 'return folder;'
file: !lambda 'return file;'- service: dfplayer_play_loop_folder
variables:
folder: int
then:
- dfplayer.play_folder:
folder: !lambda 'return folder;'
loop: true- service: dfplayer_set_device_tf
then:
- dfplayer.set_device: TF_CARD- service: dfplayer_set_device_usb
then:
- dfplayer.set_device: USB- service: dfplayer_set_volume
variables:
quantity: int
then:
- dfplayer.set_volume: !lambda 'return quantity;'
- service: dfplayer_set_eq
variables:
preset: int
then:
- dfplayer.set_eq: !lambda 'return static_cast<dfplayer::EqPreset>(preset);'- service: dfplayer_sleep
then:
- dfplayer.sleep- service: dfplayer_reset
then:
- dfplayer.reset- service: dfplayer_start
then:
- dfplayer.begin- service: dfplayer_pause
then:
- dfplayer.pause- service: dfplayer_stop
then:
- dfplayer.cease- service: dfplayer_random
then:
- dfplayer.random- service: dfplayer_volume_up
then:
- dfplayer.volume_up- service: dfplayer_volume_down
then:
- dfplayer.volume_down - Additionally, edit the Wi-Fi SSID and password secrets and techniques along with your Wi-Fi title and password. Make certain the place you will set up the smart-bell-speaker and smart-bell-switch has respectable Wi-Fi community protection.
 wifi:
    ssid: "MyWiFiName"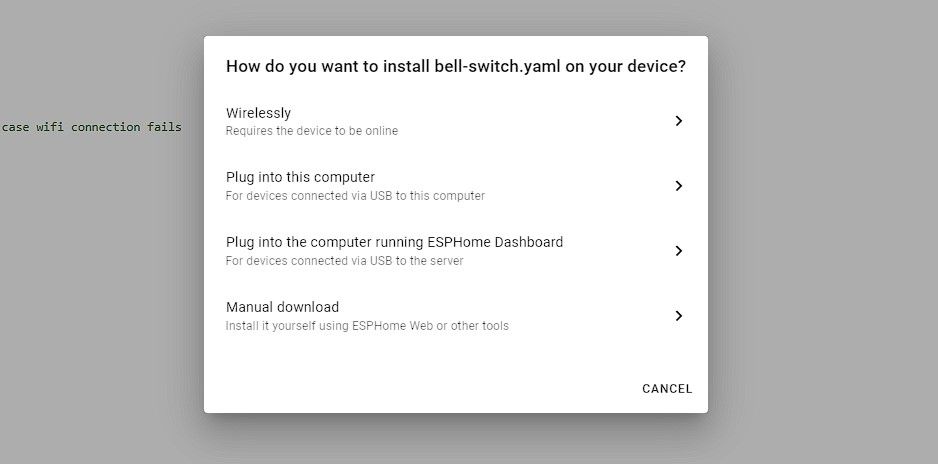
password: "MyWiFiPassword" - Click on Save after which click on Set up.
- Select Guide obtain. This may begin the firmware compilation. As soon as compiled, obtain and save the firmware in your system.
- Now open the smart-bell-switch undertaking, change the Wi-Fi secrets and techniques after which paste the next code beneath the captive_portal:
 binary_sensor:
  - platform: gpio
    title: "Sensible Bell Change"
    pin:
      quantity: 4
      mode: INPUT_PULLUP
      inverted: True
    on_press:
      - swap.toggle: relay1
    inside: Trueswap:
  - platform: gpio
    title: "Sensible Door Bell"
    icon: 'mdi:bell'
    id: relay1
    pin:
      quantity: 2
      mode: OUTPUT
inverted: True - Click on Save after which click on Set up.
- Select Guide obtain. After the compilation, the firmware will routinely begin downloading. Save each firmware on the Desktop.


Step 2: Add MP3 Sound Information to a MicroSD card
Take a small-capacity microSD card (as little as 512MB will work). Join it to your PC. Obtain your favourite bell sounds from the web, or you possibly can document your personal or your voice, and save them as MP3 information on the microSD card. Make certain to call these information as 1.mp3, 2.mp3and so on.
Step 3: Flash the Firmware to the ESP8266 Microcontroller
To flash the firmware, join the NodeMCU or D1 Mini to the PC utilizing a micro USB cable after which comply with these steps:
- Obtain and launch ESPHome-Flasher device.
- Select the COM port after which click on Browse to pick the firmware file you downloaded within the earlier step.
- Click on Flash ESP. Await the firmware to flash.
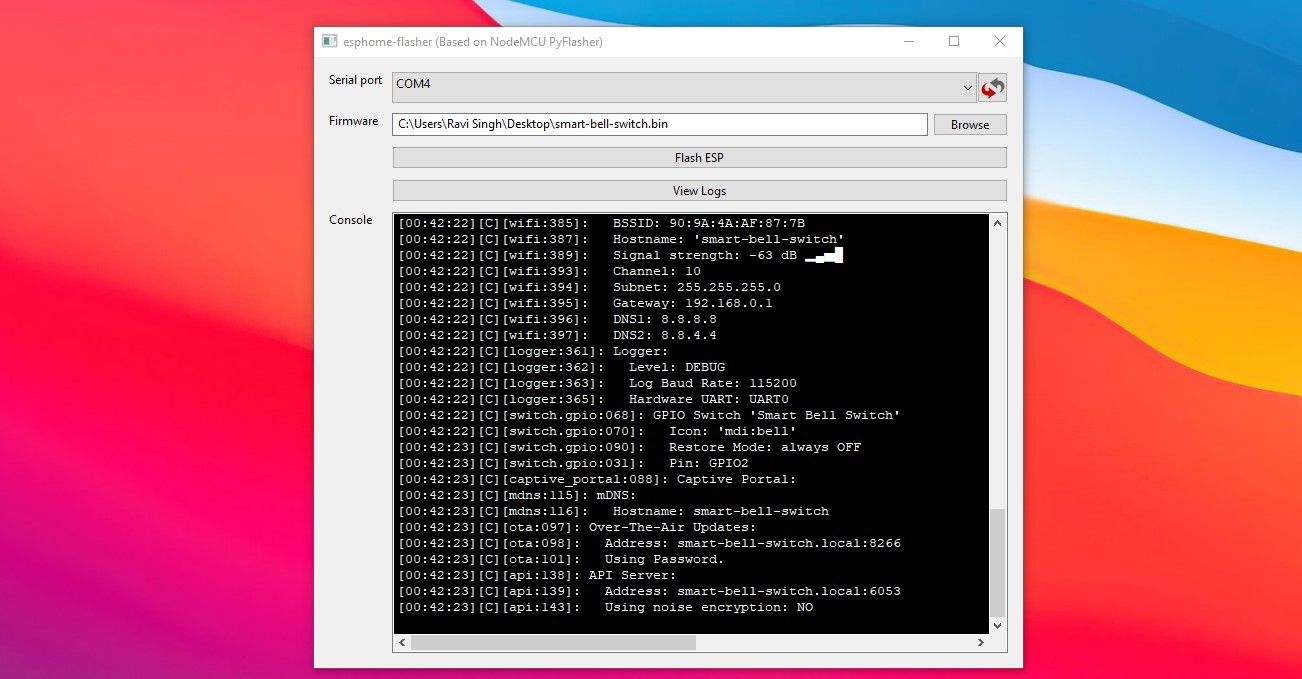
- As soon as completed, the gadget will routinely connect with the Wi-Fi community.

Observe the identical steps to flash the firmware on the 2 ESP8266 boards.
Step 4: Wiring ESP8266 Board with DFPlayer and Speaker
Confer with the next diagram to wire the DFPlayer with the ESP8266 on which you flashed the smart-bell-speaker firmware.

You should use jumper wires to make these connections and use a soldering iron to attach the speaker to the DFPlayer (MP3 participant module).
As soon as every little thing is linked, use two jumper wires (male to feminine) and join them to the smart-bell-switch ESP8266 board. It’s worthwhile to join one wire to the D2 pin on the NodeMCU or D1 Mini ESP8266 board and one other to the 3V or 3.3V pin. Then join the opposite two ends to your conventional push-button bell swap, as proven within the diagram beneath.

Make certain to double-check the wiring earlier than continuing.
Step 5: Add Units to House Assistant
We have to add each gadgets to House Assistant. To take action, comply with these steps:
- Go to Settings > Units & Providers.
- You will notice the smart-bell-switch and smart-bell-speaker (if powered on) within the Found Units checklist.
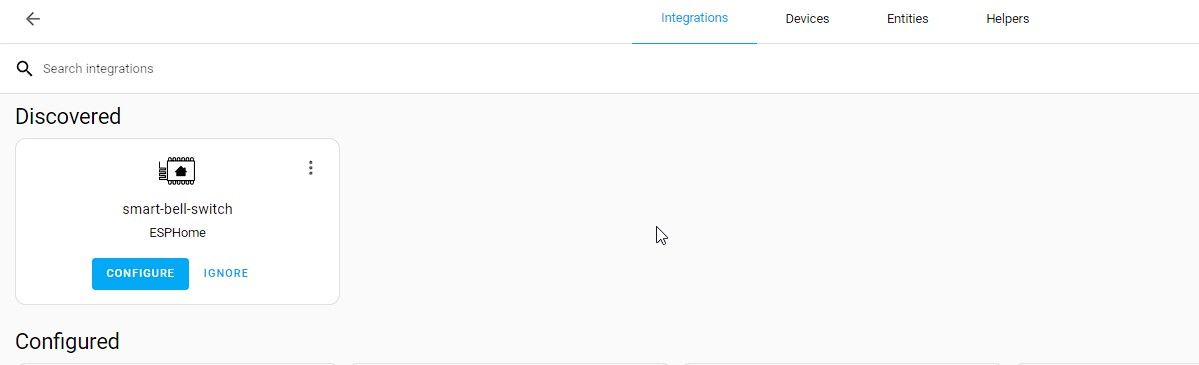
- Click on Configure > Submit.
- Select an space from the drop-down and click on End.
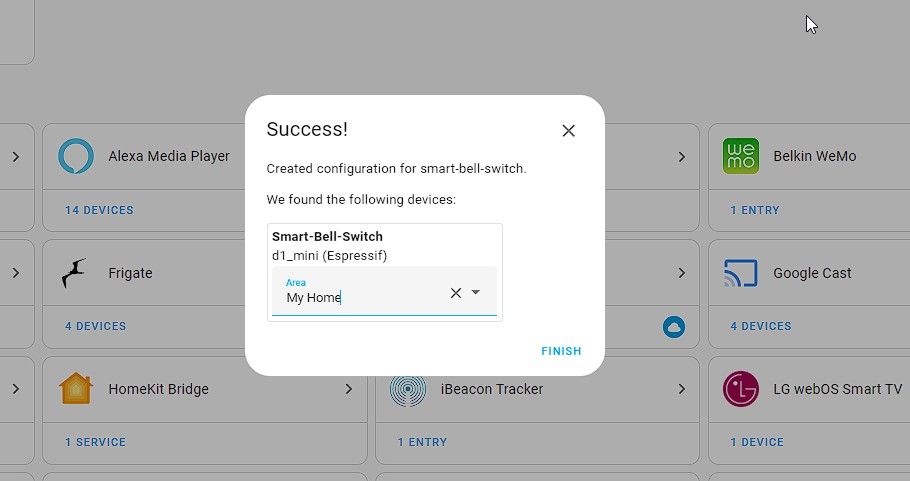
- Equally, energy on and add the smart-bell-speaker gadget to your House Assistant.


Step 6: Create Automation for Customized Bell Sound and Push Notifications
To allow push notifications to your sensible DIY Wi-Fi sensible doorbell, it is advisable to create an automation within the House Assistant. To create, one, comply with these steps:
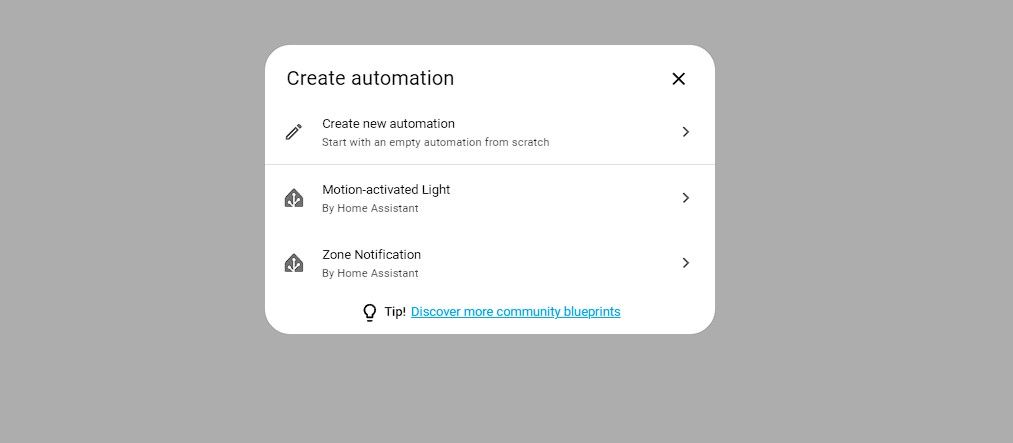
- In House Assistantgo to Settings > Automations & Scenes.
- Click on Create Automation > Create new automation.
- Click on Add Set off and choose System.
- Select smart-bell-switch after which choose Sensible Door Bell turned on within the Set off drop-down.
- Click on Add Motion and choose Name Service.
- Select ESPHome: smart_speaker_dfplayer_play from the drop-down.
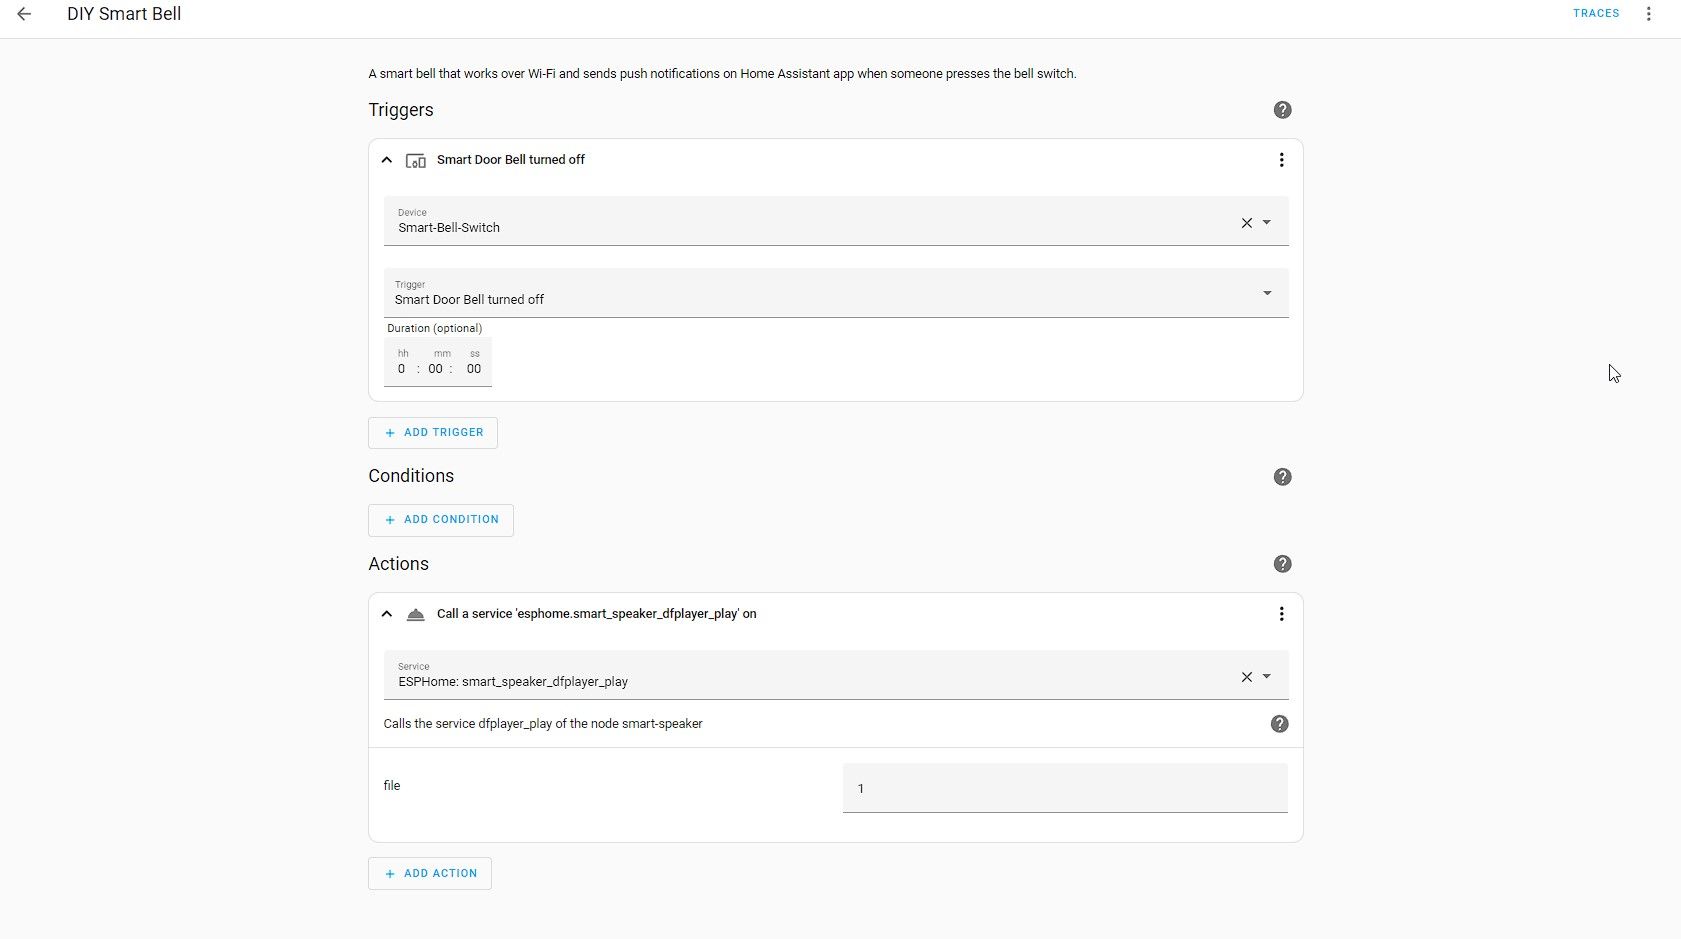
- Within the filesort 1, 2 or 3 for whichever MP3 bell sound you need to play.
- Then click on Save.
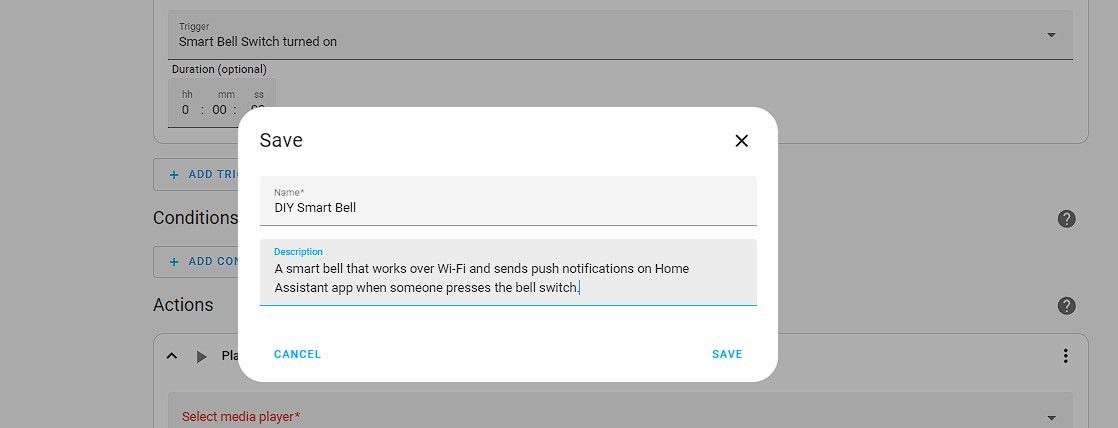
- Give the automation a reputation after which click on Save once more.
- For push notifications in your telephone, set up the House Assistant app in your smartphone, sign up to your House Assistant, after which click on Add Motion within the automation window.
- Choose Name Service and select Notifications: Ship a notification by way of mobile_app_YourPhone.
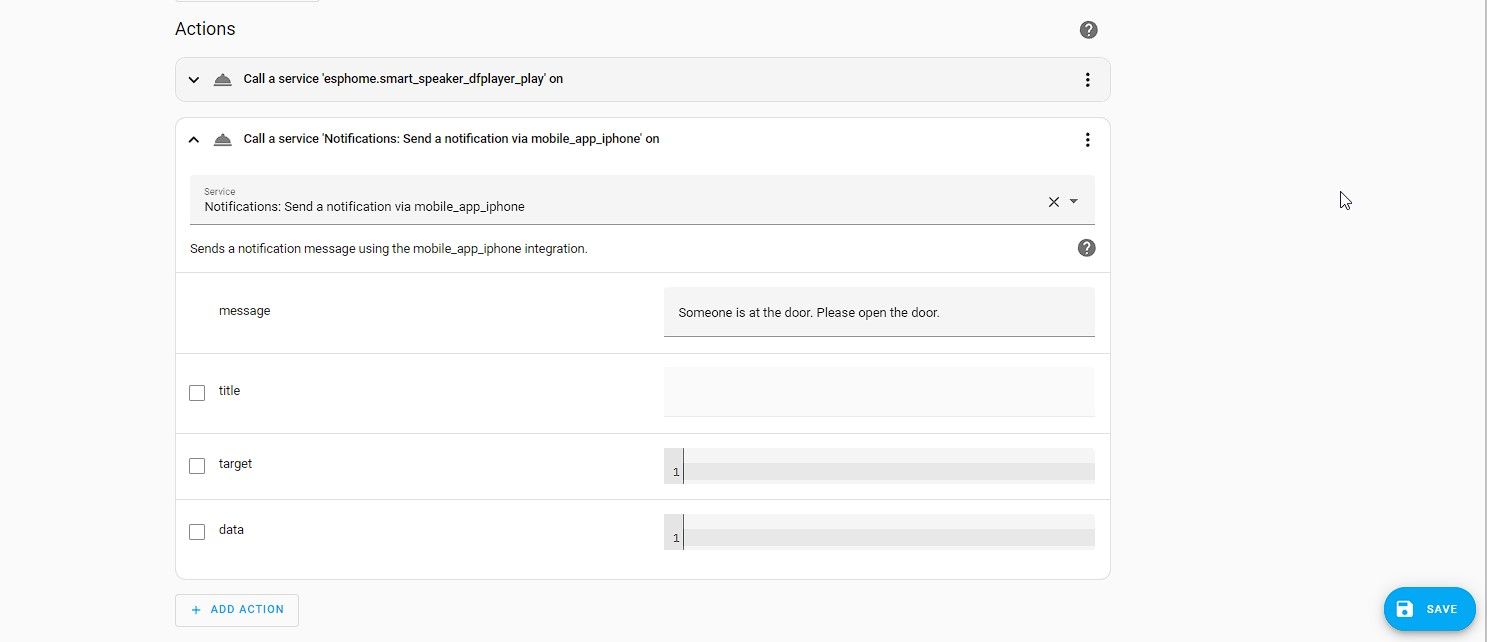
- Kind a message that you simply need to obtain within the notification and click on Save.


For those who now push the doorbell button, the bell sound will play from the smart-bell-speaker. You’ll be able to examine the logs for extra particulars if automation is working.

Make a Sensible Door Bell Smarter
Constructing your personal DIY Wi-Fi sensible doorbell utilizing ESP8266 microcontroller boards and House Assistant is a rewarding and cost-effective undertaking.
As soon as the fundamental performance of the DIY Wi-Fi sensible doorbell is working accurately, you possibly can add a CCTV IP digital camera, and combine with House Assistant utilizing Frigate NVR to create superior dwelling automation and enhance dwelling safety. You may additionally combine a PIR sensor or a contact capacitive sensor as a substitute of a standard doorbell swap. The chances with House Assistant are limitless.